Testing Your Extension
VS Code supports running and debugging tests for your extension that require the VS Code API. These tests will run inside an special instance of VS Code, the Extension Development Host, and have access to the full APIs. We refer to these tests as integration tests, because they go beyond unit tests that can run in isolattion from a VS Code window. This documentation focuses on VS Code integration tests. For unit testing, you can use any popular testing framework, like Mocha or Jasmine.
Yo Code Test Scaffolding
The basic yo code generator extension project includes a sample test as well as the necessary infrastructure to run it.
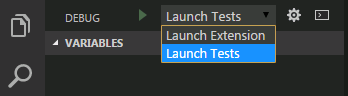
After you've created a new extension and opened the project in VS Code, you can select the Launch Tests configuration from the dropdown at the top of the Debug View.
With this configuration chosen, when you run Debug: Start (kb(workbench.action.debug.start)), VS Code launches your extension in the Extension Development Host instance and runs your tests. Test output goes to the Debug Console where you can see the test results.
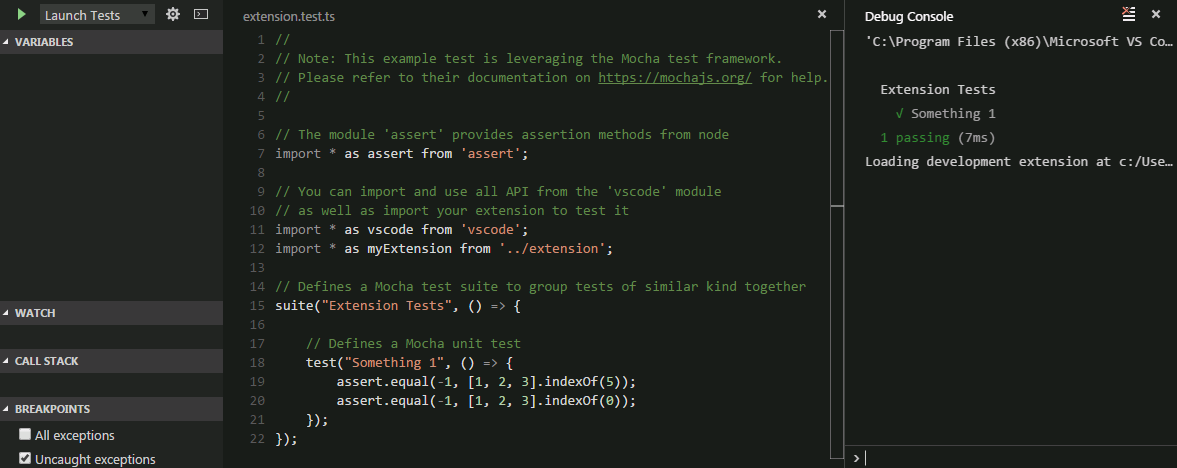
The generated test uses the Mocha test framework for its test runner and library.
The extension project comes with a test folder that includes an index.ts file which defines the Mocha testrunner configuration and an extension.test.ts which has the example Something 1 test. You can typically leave index.ts untouched, but you can modify it to adjust the configuration of Mocha.
├── test
│   ├── extension.test.ts
│   └── index.ts
You can create more test.ts files under the test folder and they will automatically be built (to out/test) and run. The test runner will only consider files matching the name pattern *.test.ts.
Launch Tests configuration
The Launch Tests configuration is defined in the project's .vscode\launch.json file. It is similar the Launch Extension configuration with the addition of the --extensionTestsPath argument which points to the compiled test files (assuming this is a TypeScript project).
{
    "name": "Launch Tests",
    "type": "extensionHost",
    "request": "launch",
    "runtimeExecutable": "${execPath}",
    "args": ["--extensionDevelopmentPath=${workspaceRoot}", "--extensionTestsPath=${workspaceRoot}/out/test" ],
    "stopOnEntry": false,
    "sourceMaps": true,
    "outDir": "out",
    "preLaunchTask": "npm"
}
Passing Arguments to the Extension Development Host
You can set the file or folder that the test instance should open by appending the path to the arguments list for the launch configuration.
"args": ["file or folder name", "--extensionDevelopmentPath=${workspaceRoot}", "--extensionTestsPath=${workspaceRoot}/out/test" ],
This way you can run your tests with predictable content and folder structure.
Excluding test files from your extension package
If you decide to share your extension, you may not want to include the tests in your extension package. The .vscodeignore file lets you exclude test files when you package and publish your extension with the vsce publishing tool. By default, the yo code generated extension project excludes the test and out/test folders.
out/test/**
test/**
Next Steps
- Debugging your Extension - Learn more about how to run and debug your extension
- vsce - Publish your extension with the VSCE command line tool.
- Extension Manifest file - VS Code extension manifest file reference
- Extension API - Learn about the VS Code extensibility APIs
Common Questions
Nothing yet