vsce - Publishing Tool Reference
vsce is the command line tool you'll use to publish extensions to the Extension Gallery. You can also load extensions locally and share them view email or a UNC drive.
Installation
Make sure you have node.js installed. Then simply run:
npm install -g vsce
Usage
You'll use the vsce command directly from the command line. For example, here's how you can quickly publish an extension:
$ vsce publish
Publishing uuid@0.0.1...
Successfully published uuid@0.0.1!
For a reference on all the available commands, run vsce --help.
Publishing Extensions
Visual Studio Code leverages Visual Studio Online for its gallery services. This means that authentication, hosting and management of extensions is provided through that service.
vsce can only publish extensions using Personal Access Tokens. You need to create at least one in order to publish an extension.
Get a Personal Access Token
First, login to or sign up for Visual Studio Online.
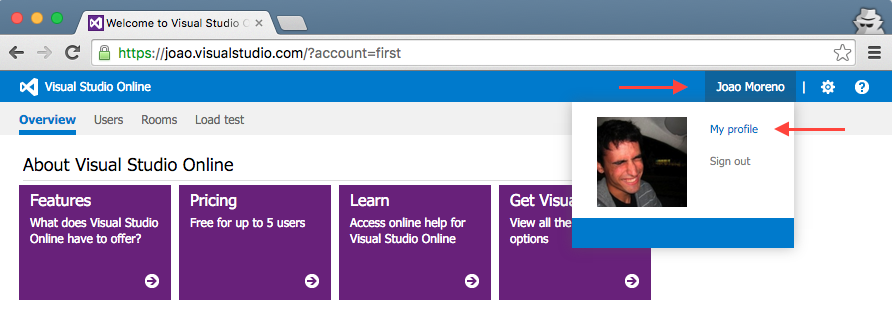
Then, from your account's home page https://ACCOUNT.visualstudio.com, go to the My Profile page:
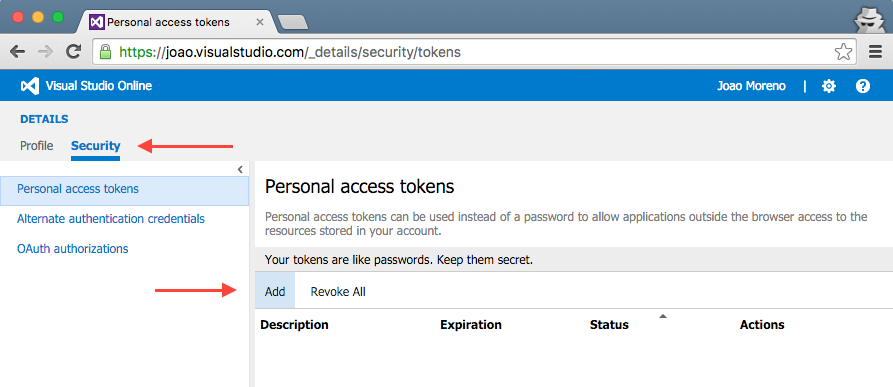
Switch to the Security tab and Add a new Personal Access Token:
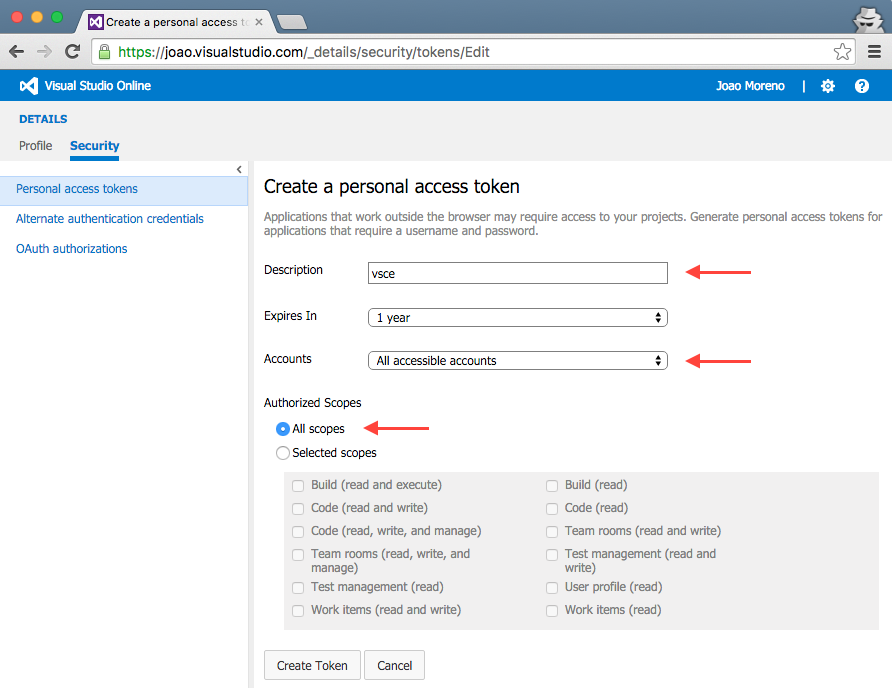
Give the Personal Access Token a nice description, optionally extend its expiration date to 1 year and make it access every account:
The next screen will display your newly created Personal Access Token. Copy it, you'll need it to create a publisher.
Create a Publisher
A publisher is an identity who can publish extensions to the Visual Studio Code gallery. Every extension needs to include a publisher name in its package.json file.
Once you have a Personal Access Token, you can create a new publisher using vsce:
vsce create-publisher <publisher>
vsce will remember the provided Personal Access Token for future references to this publisher.
Login to a Publisher
If you already created a publisher before and simply want to use it with vsce:
vsce login <publisher>
Similarly to the create command, vsce will ask you for the Personal Access Token and remember it for future commands.
Packaging Extensions
You may want to simply package extensions without publishing them to the store. Extensions will always be packaged into a .vsix file. Here's how:
vsce package
This will package your extension into a .vsix file and place it in the current directory. It's possible to install .vsix files into Visual Studio Code. See Installing Extensions for more details.
Advanced Usage
Marketplace Integration
You can customize how your extension looks in the Visual Studio Marketplace. See the Go extension for an example.
Here are some tips for making your extension look great on the Marketplace:
- Any
README.mdfile at the root of your extension will be used to populate the extension's gallery page's contents. Note: since the gallery doesn't serve images yet, you may find images and/or links to be broken in the extension's gallery page.vscecan fix this for you in two different ways: - If you add a
repositoryfield to yourpackage.jsonand if it is a public GitHub repository,vscewill automatically detect it and adjust the links accordingly. - You can override that behavior and/or set it by using the
--baseContentUrland--baseImagesUrlflags when runningvsce publish. - You can set the banner background color by setting
galleryBanner.colorto the intended hex value inpackage.json. - You can set an icon by setting
iconto a relative path to a squared128pxPNG file included in your extension, inpackage.json.
Also see Marketplace Presentation Tips.
.vscodeignore
You can create a .vscodeignore file to exclude some files from being included in your extension's package. This file is a collection of glob patterns, one per line.
For example:
**/*.ts
**/tsconfig.json
!file.ts
You should ignore all files not needed at runtime. For example, if your extension is written in TypeScript, you should ignore all **/*.ts files, like in the previous example.
Note: Development dependencies listed in devDependencies will be automatically ignored, you don't need to add them to the .vscodeignore file.
Pre-publish step
It's possible to add a pre-publish step to your manifest file. The command will be called every time the extension is packaged.
{
    "name": "uuid",
    "version": "0.0.1",
    "publisher": "joaomoreno",
    "engines": {
        "vscode": "0.10.x"
    },
    "scripts": {
        "vscode:prepublish": "tsc"
    }
}
This will always invoke the TypeScript compiler whenever the extension is packaged.
Next Steps
- Extension Gallery - Learn more about VS Code's public extension gallery.
- Installing Extensions - Learn about other options for installing and sharing extensions.
Common Questions
Q: I get 403 forbidden when I try to publish my extension?
A: One easy mistake to make when creating the PAT (Personal Access Token) is to not select all accounts as the account scope (instead selecting a specific token you have access to). You need to provide the all accounts scope for the publish to work.
Q: I can't unpublish my extension through the vsce tool?
A: You may have changed your extension ID or publisher name. You can also manage your extensions directly on the Marketplace by going to the manage page. You can update or unpublish your extension from your publisher manage page.